Theres something for everyone. Sometimes there is mould release agent residue left behind. Drybrushing is not too friendly to your nice premium brushes. if it is, you can remove some using a paintbrush or small twists of tissue paper. Try not to accidentally cover up all the bottom paint layers on your miniature during the buildup, or else you will get a flat texture and have to start all over again. Use a pencil to mark out rough layers of stone on your wall. Unsanded grout allows you to create the texture you want with a brush or artist's knife. We are painting stonework quickly and effectively.

The Arena Media Brands, LLC and respective content providers to this website may receive compensation for some links to products and services on this website. You should prime your stones prior to painting in order to get clear, bold colors. Have manageable goals, that are realistic, and stick to them! I painted the earth at the base of the wall Vallejo Model Colour 70.872 Chocolate Brown, the gate and spikes on top of the wall Vallejo Model Colour 70.863 Gunmetal Grey and picked out the Skulls in Army Painter Skeleton Bone. Art Radar conducts original research and scans global news sources to bring you the taste-changing, news-making and up-and-coming in Asian contemporary art. I brushed on a wash of Army Painter Strong Tone ink. Its disadvantage is that it sets up quickly and once set needs strong carving or sanding tools to adjust it. This is not necessary for dressed (block) stone walls. Lesley Shepherd is a miniature artisan who shares her knowledge about miniatures. Winning! But that doesnt mean we cant enjoy it nor make it effective for the tabletop. This article was written by a Guest Columnist who requested anonymity.
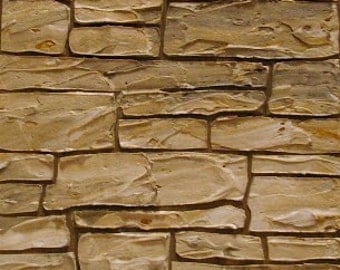
Stone Paint Indoors Architectural Digest says you should use latex acrylic paint that is easy on the body after application, which will easily bond. I went with a Codex Grey base with a Fortress Grey highlight around the edges and cracks, and very lightly drybrushed all over with Fortress as well. Sanding is awesome on most materials/projects. I suggest you give it a go. Amongst them were a couple of requests for a quick tutorial on how I painted the Yorkshire Stone effect. The Elder Scrolls are an incredibly popular series of games, now in ttrpg format. You may be wondering Why Yorkshire stone..?. Do you recommend any particular paints for particular purposes? Do you want rough-carved blocks, exactly square blocks, rough-edged dry stone walls, walls made from river rounded cobbles?

Although your first attempt may not be exactly what you want, keep experimenting to find a method that works for you. But for this one, it just seemed to texture the foam in a way I really wasnt too keen on. It would definitely work wonders on a full building or ruins. Freestanding stone wall sections made of insulation foam are considerably strengthened by using a coating. Send in the Big Guns! Dry stone walls can have some deep crevices between stones. Foam boards can be difficult to glue. Get DIY project ideas and easy-to-follow crafts to help you spruce up your space.

Apply it over some of the streaks or lichen stains to make the rock there look dank. The Other Ones Guide to Painting Yorkshire StoneTutorial, Scenery for Kings of War Vanguard | The Other One's Vault of the Undead. After trying to sand, I cut out some corners, and added some cracks and divots to complete the weathering. Brittney is a writer, curator and contemporary art gallerist. After a quick touch up of the gunmetal paint on the hoops either side of the gate, I added some Modelmates rust effect paint to the metal sections and highlighted the skulls here and there with the same Dark Sand:White mix. Lightweight, Inexpensive Scale Models of Stone Walls, Strengthof Foam for Miniature Stone Walls, Coatings to Texture and Strengthen Faux Foam Walls, How to Carve Faux Stone Effects in Rigid Foam, Decide on the Style of Stones You Want for Your Wall, Using Coatings to Strengthen Walls Made From Foam, Make Stone Walls From Styrofoam Bead Board, Create the Individual Faux Stone Outlines, Creating the First Layers of a Faux Stone Effect on Styrofoam Walls, Check Photos of Actual Stone Walls for Reference, Add Flecks for Stone Texture With Spatter Techniques, Balance out The Final Miniature Faux Stone Effect, Changing Faux Stone Finishing Effects With Texture, Other Examples of Stone Models Made From Foam, Make Realistic Water Features in Any Model Scale Using Sheet Plastic, Painted Stones and Rocks Are Easy to Make and Great for Gifts, Make Tiny Realistic Palms From Paper or Fabric, Flaunt Your Green Thumb With This DIY Mini Greenhouse, How to Use E-Z Water to Make Miniature Water Features, How to Make Corrugated Metal for Scale Buildings, Here's how to create interesting texture using acrylic texture medium, How to Fix Mistakes and Make Changes in Watercolor Painting, Match Old and New Wood with Common Household Items, Waterproofing Paper: 7 Ways to Waterproof Paper, 15 Adhesives That Should Be in Every Crafter's Tool Box, Keep Your Cosmetics Tidy With This DIY Makeup Organizer, How to Make a DIY Ice Cream Sundae Costume. In the sample above, the deep cracks look more natural. The dense foam coat coating made stones with very similar surface texture to the ones in the commercial well it is intended to fit beside in the scene. While the article is lost to the warp after the purge, its spirit lives on in this tutorial. Lesley is also a professional museum model maker.

So I dont really suggest sanding all that much. Fill in your details below or click an icon to log in: You are commenting using your WordPress.com account. Big Fish Design. You won't be applying much more color between the stones, so the bead shapes need to be well disguised with your darkest color in these areas. Once dried, the wall looks like this. Grout can be colored, sanded and painted and makes a very strong surface over weak foams. It is best to let the paint dry before proceeding. I chose a blue-gray as the base color for the stonework here. To use this wall close to existing commercial models made of resin, raw umber, and ochre colors were dry brushed over the grays to make a closer color blend to the commercial stones on the well. Its really great stuff and I highly recommend it. That brings me to Reason Two: I live in Yorkshire and ever since I moved here in 1990, Ive been enchanted by the colour of Yorkshire stone, especially when sunlight is shining on the local buildings and they almost light up with a honeyed glow. Note all the colors present, from dark to light. You can use a pencil or a knife to scribe the general layer lines for your faux stone wall. Plus painting it all in a uniform way is not only unrealistic, it is not fun. Names, trademarks, and images copyright theirrespective owner. So long story short dont use sharpie on foam projects! On this wall, more dry brushing of various colors is needed to balance out the wall colors before the final highlight layer is added. This was merely a time killer, again not a finished or completed piece, but it does its job as an easy quick piece of terrain that can really spice up a battlefield. Dont forget to visit The Painting Corps for regular updates with tips for the newest wargamer to the most grizzled veterans. So, I decided to try and replicate the golden colour of Yorkshire Stone in my scenery. How To Remove Paint Off Kitchen Cabinets With Alcohol? As a natural stone stain, Whitewash was created because of its breathable nature and eco-friendliness. The wavy accessory would also be good for very thin mixes and filter washes. This is a messy process when using styrofoam beadboard as the beads go everywhere! In some scales, a spatter technique works well to add detail to faux stone. Get Tabletop, RPG & Pop Culture news delivered directly to your inbox.


With the base colour added here and there, the wall looks like this: I next mixed a little brown paint into the base colour and painted a couple of random stones using this colour and then did the same by mixing some grey into the base colour and picking out another few stones. I ended up skipping the pencil step for this piece and just cut into the foam at angles to get the separation for each stone. You can use a stiff brush or an old toothbrush and run a palette knife across the bristles away from the surface you want to spatter, to produce speckles of color on the stone.

If you are making block walls, mark out the individual blocks with a pencil or craft knife. Although foam can easily be made into stone for walls, model horse jumps or buildings, or left to free-fall down mountain terrains in railroad scenes; you may prefer more structured modeled stones from plaster, clay or paper clay. These include UHU POR glue, Styro Glue (3M) and some craft glues for styrofoam. The stone technique used here can now be used on thin slices of foam glued to simple bookboard buildings, and more stone walls and outbuildings can be added to the scene keeping a similar look to the commercial pieces. With this, I want to get my scenery done for the game. This really doesnt work as easily as you expect it to.

Drywall and spackle tend to absorb moisture and have a tendency to crack and chip. After washing the kit in warm, sightly soapy and allowing it to thoroughly dry, I undercoated it in Vallejo Model Colour Black paint using my airbrush. An off-white in some spots can bring back a highlight lost under the oil washes. Compare your stone finish to photos of actual stone walls if you can.

The lightest color should be only on the outermost surfaces of the stones, the areas which would be most exposed to light. Although this may take a couple of layers, it is not necessarily slow to do, and has a rewarding finish. Because of all the angles and textures, we can have a lot of fun and paint quicker with a drybrush. Its after painting the Fortified Manor that I feel Im finally happy with how the stone effect looks. Theres something for everyone. Head over and join the conversation! Apply it liberally. If you want to go to town you could mix in a little olive green with the base colour too and pick out a few more stones in this. Progressively use lighter colors on every layer. As far as I could tell, too, there was no flash or sprue gates to file away either. When you have marked out the outline of your stones, use your knife to carve into individual stones if you need them to have rounded or split surfaces. When looking for speed, we can make oils fast and effective too! If pieces are handled a lot, use dense insulation foams glued to thin wood backings, or use the air dry clay or paper clay method of creating a stone effect on Gatorfoam or wood. Don't worry if you get too much color in an area (see the section of wall on the right in the photo) You can always go back over the section with another coat of some darker paint to break up large areas where you applied to much paint. Head over and join the conversation! Even applying it liberally it is not messy or pooling like an acrylic wash. This looked like moss and lichen growth staining the rockface. Ultimately the goal is getting them battle ready but have fun doing so. Go in for a second layer of paint with a lighter color.

Using the dark gray base first mixed as the main color, and adding additional colors to this base color to lighten and adjust it, keeps the colors in the same tonal range and is quite effective. Have to say, Im rather impressed with the results for such a quick and easy project. If you have been using a dry brush (a brush first loaded with paint that you press into a paper to remove the paint from the tips of the brush) to drag across the stones, add the lightest color to some stones using the same technique. Lizard Landscapesshows steps in making all kinds of foam landscapes from a castle to a sandstone desert scene. document.getElementById( "ak_js_1" ).setAttribute( "value", ( new Date() ).getTime() ); Enter your email address to follow my blog and receive notifications of new posts by email. Cut the block lines at a very slight angle so you will have more than a knife slit separating them. With the main wall lines scribed, use the pencil or the knife to draw semi-vertical lines between the layer lines to create the outlines of your stones. If youve done something similar, we would love to see it! I find that using a flat brush results in less air bubbles in the ink as you apply it, compared to using a round bristled brush. Make sure you carve stones on all sides of your wall or building, most dry stone walls will have a capping layer one or two stones across on the top of the wall. (note the airbrushed base coat looks a little darker in this picture than the one above simply because it was getting dark outside as I took this photo).

Although I also like a little paper towel too, to help remove excess paint from the dry brush before painting. You can see examples of this (with varying degrees of success) in how Ive painted my Tabletop World Stone Bridge, Windmill and the GW Deathknell Watch, Walls and Fences and Fortified Manor. The techniques are the same whether you are making miniature terrains, railroads, dollhouses, or terrariums for your lizard. You can spatter or dry brush the dark and mid-tone colors on top of the lighter color in some places to break up areas which are too flat. James is using the following RedgrassGames Painting tools. WHAT DO I WANT TO ACHIEVE WITH THIS MODEL? for regular updates with tips for the newest wargamer to the most grizzled veterans. Change).

Use a drop cloth to cover the floor below and around the stone wall. But a final drybrush and some detail work will really make it pop. The durability of the piece will depend on the coating you protect the foam with, as well as how much handling the piece must endure. Editor: Danni Button, Adam Harrison When coloring your faux stones or walls, you should work with a simple palette of colors chosen to match your scene. A quick note first. I decided to start with a reliable old sharpie marker to get the lines down. Your email address will not be published. For the final scene, sections of the wall will be made using the same techniques and colors, but adapting the process by thinning the dark coat intended for the cracks between the stones. Hi there fellow Minipainters, this is my full-length tutorial from the 2020 PATMOCON in which I painted a realistic looking stone wall. I was really happy with how this final stage made the mini pop! Thanks for sharing. jayjay40 from Bristol England on February 17, 2010: Love the hub, I'll use this for my warhammer buildings. I then used a paintbrush to apply the base #62 Sand colour to random pieces of stone, the pillars and capstones. When you have the sample the way you like it, it is easy to create a range of other pieces to match. Use a fairly heavy layer of foam coat, gesso or grout, mixed to your darkest color, and apply with a stiff brush (or a palette knife for grout) to the entire wall, on all sides, including the bottom of the wall to help seal and protect it. You can even ruin the appearance of your stone when you paint it.
Sitemap 30