 We went with Black Magic. Fields with an asterisk (*) are required. Archie Guerrero is a Commercial and Residential Painting Specialist and the Operations Manager for DGP Painting in Austin, Texas.
  Continue to the lower sash beginning with the crossbar. Both of these methods will result in unevenly applied paint, and will look rushed or sloppy once youve finished. Glossy paint on walls and ceilings highlights flaws and produces uncomfortable reflected light. You'll never miss out on the best Behr promotions, products and news. Painters tape should be available at your local hardware store. If you want a paint that's easy to use and simple to clean up, water-based paints are the way to go. A semi-gloss enamel sheen is sleek and radiant resisting mildew, moisture and wear. Not just that but flat or matte trim paint chips more readily than glossier paint. Continue until the window trim is complete. (ft). Low-traffic areas; interior walls and ceilings. Trim paint is a category of interior paint that has a satin, semi-gloss, gloss, or high gloss sheen. Alexandra Kay is a writer, fact-checker, researcher, and editor who checks The Spruce articles for accuracy and adds source citations. Include your email address to get a message when this question is answered. Wood and vinyl walls and siding; brick and other masonry; fences. DGP Painting offers clients environmentally friendly paint materials and top-of-the-line paint products. Look in your local phone book. At the least, use satin gloss on trim. The surface will not have the rock-hard shell texture of oil-based paints. There are 8 references cited in this article, which can be found at the bottom of the page. Dont rush the painting strokes or paint in short, abrupt strokes. Can be color matched in a variety of colors.
  I f, Our family ornament tree holds so many memories an, Painters plastic sheeting with tape attached, to cover the floor you can also use old towels, Pro Industrial Multi-Surface Acrylic by Sherwin-Williams, We Painted the Exterior of our House! Call a professional. This will allow the paint to drip downwards while you paint higher sections of the trim. With your brush, begin painting the inside frame of the window starting at the top of the frame. Because of its thick consistency, oil-based paint is good at filling in minor holes. Without this feature, different window trims will yellow at different rates. Even different sections within the same window will yellow differently.
  Maintain your painted window frames and safely wipe away dirt and common household stains with BEHR SWIPES Interior Wall Wipes. Deane Biermeier is an expert contractor with nearly 30 years of experience in all types of home repair, maintenance, and remodeling. Otherwise, they will stick together. DGP Painting has an A+ rating with the BBB and has been in Austins Best of the Best.
 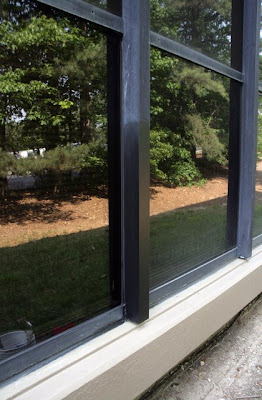 Most people buy just a quart or a gallon of trim paint, rather than the multiple gallons required when painting room walls.
  Continue until all side edges of the trim are complete. So many colours and so many ideas: Visit Behrs Colour Studio for inspiration, colour tools, design advice and everything you need to find your projects perfect colour. PAINT, WOOD
If you close the window while paint is still wet, the window will become painted shut. Environmental Protection Agency. Since the paint will adhere optimally to the wooden trim if the trim is smooth and has no scratches, youll want to use a fine-grain sandpaper for this step. This quickly went from wanting, Here are the DIY frames! Thicker consistencies of paint help prevent sagging. A flat sheen is non-reflective, and easy to apply and touch up. A satin enamel sheen has a pearl-like finish that's easy to clean. He is a certified lead carpenter and also holds a certification from the EPA. This trim is typically about three inches wide, and may also include a protruding windowsill at the bottom of the frame.
Continue until all side edges of the trim are complete. So many colours and so many ideas: Visit Behrs Colour Studio for inspiration, colour tools, design advice and everything you need to find your projects perfect colour. PAINT, WOOD
If you close the window while paint is still wet, the window will become painted shut. Environmental Protection Agency. Since the paint will adhere optimally to the wooden trim if the trim is smooth and has no scratches, youll want to use a fine-grain sandpaper for this step. This quickly went from wanting, Here are the DIY frames! Thicker consistencies of paint help prevent sagging. A flat sheen is non-reflective, and easy to apply and touch up. A satin enamel sheen has a pearl-like finish that's easy to clean. He is a certified lead carpenter and also holds a certification from the EPA. This trim is typically about three inches wide, and may also include a protruding windowsill at the bottom of the frame.  If you have a house that is at least a few decades old, chances are good that the trim was painted with oil-based paint. Hi-Gloss enamel sheens provide have a brilliant, shiny appearance and a durable, glass-like finish that allows dirt and grime to be wiped clean. Commercial & Residential Painting Specialist. Your local hardware store will stock sandpaper; look for something around 120180 grit. Because flat sheen paints have far fewer resins than the glossy types, they are not as good at resisting dirt and stains. Although a high-gloss paint will catch your (and your guests) eye, it will only look good on high quality and extremely smooth wood. By clicking Accept All Cookies, you agree to the storing of cookies on your device to enhance site navigation, analyze site usage, and assist in our marketing efforts.

 A semi-gloss enamel sheen is sleek and radiant with a hard, durable finish. Last Updated: September 15, 2021 Repeat the process with the obstructed sash areas. {"smallUrl":"https:\/\/www.wikihow.com\/images\/thumb\/9\/90\/Paint-Interior-Window-Trim-Step-1.jpg\/v4-460px-Paint-Interior-Window-Trim-Step-1.jpg","bigUrl":"\/images\/thumb\/9\/90\/Paint-Interior-Window-Trim-Step-1.jpg\/aid8691449-v4-728px-Paint-Interior-Window-Trim-Step-1.jpg","smallWidth":460,"smallHeight":306,"bigWidth":728,"bigHeight":485,"licensing":"
License: Creative Commons<\/a> License: Creative Commons<\/a> License: Creative Commons<\/a> License: Creative Commons<\/a> License: Creative Commons<\/a> License: Creative Commons<\/a> License: Creative Commons<\/a> License: Creative Commons<\/a> License: Creative Commons<\/a> License: Creative Commons<\/a> License: Creative Commons<\/a> License: Creative Commons<\/a>
\n<\/p>
\n<\/p><\/div>"}, {"smallUrl":"https:\/\/www.wikihow.com\/images\/thumb\/e\/e0\/Paint-Interior-Window-Trim-Step-2.jpg\/v4-460px-Paint-Interior-Window-Trim-Step-2.jpg","bigUrl":"\/images\/thumb\/e\/e0\/Paint-Interior-Window-Trim-Step-2.jpg\/aid8691449-v4-728px-Paint-Interior-Window-Trim-Step-2.jpg","smallWidth":460,"smallHeight":306,"bigWidth":728,"bigHeight":485,"licensing":"
\n<\/p>
\n<\/p><\/div>"}, {"smallUrl":"https:\/\/www.wikihow.com\/images\/thumb\/8\/82\/Paint-Interior-Window-Trim-Step-3.jpg\/v4-460px-Paint-Interior-Window-Trim-Step-3.jpg","bigUrl":"\/images\/thumb\/8\/82\/Paint-Interior-Window-Trim-Step-3.jpg\/aid8691449-v4-728px-Paint-Interior-Window-Trim-Step-3.jpg","smallWidth":460,"smallHeight":306,"bigWidth":728,"bigHeight":485,"licensing":"
\n<\/p>
\n<\/p><\/div>"}, {"smallUrl":"https:\/\/www.wikihow.com\/images\/thumb\/1\/16\/Paint-Interior-Window-Trim-Step-4.jpg\/v4-460px-Paint-Interior-Window-Trim-Step-4.jpg","bigUrl":"\/images\/thumb\/1\/16\/Paint-Interior-Window-Trim-Step-4.jpg\/aid8691449-v4-728px-Paint-Interior-Window-Trim-Step-4.jpg","smallWidth":460,"smallHeight":306,"bigWidth":728,"bigHeight":485,"licensing":"
\n<\/p>
\n<\/p><\/div>"}, {"smallUrl":"https:\/\/www.wikihow.com\/images\/thumb\/d\/d8\/Paint-Interior-Window-Trim-Step-5.jpg\/v4-460px-Paint-Interior-Window-Trim-Step-5.jpg","bigUrl":"\/images\/thumb\/d\/d8\/Paint-Interior-Window-Trim-Step-5.jpg\/aid8691449-v4-728px-Paint-Interior-Window-Trim-Step-5.jpg","smallWidth":460,"smallHeight":306,"bigWidth":728,"bigHeight":485,"licensing":"
\n<\/p>
\n<\/p><\/div>"}, {"smallUrl":"https:\/\/www.wikihow.com\/images\/thumb\/e\/e8\/Paint-Interior-Window-Trim-Step-6.jpg\/v4-460px-Paint-Interior-Window-Trim-Step-6.jpg","bigUrl":"\/images\/thumb\/e\/e8\/Paint-Interior-Window-Trim-Step-6.jpg\/aid8691449-v4-728px-Paint-Interior-Window-Trim-Step-6.jpg","smallWidth":460,"smallHeight":306,"bigWidth":728,"bigHeight":485,"licensing":"
\n<\/p>
\n<\/p><\/div>"}, {"smallUrl":"https:\/\/www.wikihow.com\/images\/thumb\/d\/d2\/Paint-Interior-Window-Trim-Step-7.jpg\/v4-460px-Paint-Interior-Window-Trim-Step-7.jpg","bigUrl":"\/images\/thumb\/d\/d2\/Paint-Interior-Window-Trim-Step-7.jpg\/aid8691449-v4-728px-Paint-Interior-Window-Trim-Step-7.jpg","smallWidth":460,"smallHeight":306,"bigWidth":728,"bigHeight":485,"licensing":"
\n<\/p>
\n<\/p><\/div>"}, {"smallUrl":"https:\/\/www.wikihow.com\/images\/thumb\/f\/f9\/Paint-Interior-Window-Trim-Step-9.jpg\/v4-460px-Paint-Interior-Window-Trim-Step-9.jpg","bigUrl":"\/images\/thumb\/f\/f9\/Paint-Interior-Window-Trim-Step-9.jpg\/aid8691449-v4-728px-Paint-Interior-Window-Trim-Step-9.jpg","smallWidth":460,"smallHeight":306,"bigWidth":728,"bigHeight":485,"licensing":"
\n<\/p>
\n<\/p><\/div>"}, {"smallUrl":"https:\/\/www.wikihow.com\/images\/thumb\/4\/4d\/Paint-Interior-Window-Trim-Step-10.jpg\/v4-460px-Paint-Interior-Window-Trim-Step-10.jpg","bigUrl":"\/images\/thumb\/4\/4d\/Paint-Interior-Window-Trim-Step-10.jpg\/aid8691449-v4-728px-Paint-Interior-Window-Trim-Step-10.jpg","smallWidth":460,"smallHeight":306,"bigWidth":728,"bigHeight":485,"licensing":"
\n<\/p>
\n<\/p><\/div>"}, {"smallUrl":"https:\/\/www.wikihow.com\/images\/thumb\/9\/9d\/Paint-Interior-Window-Trim-Step-11.jpg\/v4-460px-Paint-Interior-Window-Trim-Step-11.jpg","bigUrl":"\/images\/thumb\/9\/9d\/Paint-Interior-Window-Trim-Step-11.jpg\/aid8691449-v4-728px-Paint-Interior-Window-Trim-Step-11.jpg","smallWidth":460,"smallHeight":306,"bigWidth":728,"bigHeight":485,"licensing":"
\n<\/p>
\n<\/p><\/div>"}, {"smallUrl":"https:\/\/www.wikihow.com\/images\/thumb\/e\/ec\/Paint-Interior-Window-Trim-Step-12.jpg\/v4-460px-Paint-Interior-Window-Trim-Step-12.jpg","bigUrl":"\/images\/thumb\/e\/ec\/Paint-Interior-Window-Trim-Step-12.jpg\/aid8691449-v4-728px-Paint-Interior-Window-Trim-Step-12.jpg","smallWidth":460,"smallHeight":306,"bigWidth":728,"bigHeight":485,"licensing":"
\n<\/p>
\n<\/p><\/div>"}, {"smallUrl":"https:\/\/www.wikihow.com\/images\/thumb\/a\/a9\/Paint-Interior-Window-Trim-Step-13.jpg\/v4-460px-Paint-Interior-Window-Trim-Step-13.jpg","bigUrl":"\/images\/thumb\/a\/a9\/Paint-Interior-Window-Trim-Step-13.jpg\/aid8691449-v4-728px-Paint-Interior-Window-Trim-Step-13.jpg","smallWidth":460,"smallHeight":306,"bigWidth":728,"bigHeight":485,"licensing":"
\n<\/p>
\n<\/p><\/div>"}. Fields with an asterisk (*) are required.
Sitemap 14